Support
Care & Use Q & A
The following Q&As have been gathered from fellow owners, including both newcomers and seasoned veterans. No matter where you are in your journey, we are excited to receive your questions, learn about your culinary quests, and assist you with the care of your range. The ranges are built with endurance and simplicity in mind. With the right maintenance and care, your range can provide dependable service for years to come.
For questions regarding care and use, please contact our Customer Care Team.
Ph: 425-481-8850 care@frenchranges.com.
We look forward to hearing from you!
Before Using Your Range
What accessories come with my range and what do they do?
Your range comes with a pastry sheet, drip pan, drip pan broiler insert, small reduction trivet(s), wok ring, pastry sheet, and portable simmer plate if you ordered a Classique model. Please see our accessories link for more information about these accessories and others not listed.
Drip Pan/Broiler Insert: This can be used as a broiler pan with the broiler insert. When used separately, it may be placed on the bottom of the oven to catch spill-over. It can also be used to cook or bake directly in.
Small Reduction Trivet: The trivet bridges the gap between the cooktop grate tins, allowing for very small pots to fit over the 5K, 11K, and 15K burners. There is a larger trivet for sale for the 18K burner.
Wok Ring: The cast iron wok ring supports a large wok for stir-frying. It is primarily intended for use above the 18,000 BTU center burner on either the Classique or Traditional hob. Never store or use the wok ring on the stainless cooktop surface, as permanent damage to the stainless steel may occur.
Pastry Sheet: This metal sheet interlocks onto the top of the oven racks. The pastry sheet can be used for items such as rolls, pastries, small pizzas, and reheating items.
Portable Simmer Plate: (Comes with every Classique cooktop. Sold separately for the Traditional Cooktop): The portable simmer plate will diffuse the heat of the burners to provide a softened, more gently tempered heating surface. Simply set the portable simmer plate directly on a side grate, over a pair of side burners. You may choose to use one burner or two burners depending on the number of pots on the plate surface. To lower the temperature of a pot, gently slide it away from the heat source.
My contractors left the accessories inside the oven; can they stay in there?
Although you can leave them in the oven to store them, it is best to take them out when using the oven. Removing them will allow heat to flow throughout the oven without obstructions.
How many racks should come with each oven?
2 in gas
2 in electric
4 in vertical convection oven
4 in the warming cupboard
None in petite oven–For the petite oven, the drip pan slides into the rack guides.
How do I put the racks in?
The back bar of the oven rack should be at the rear of the oven. The safety-tip catch ensures the rack is stopped before being over extended.
What are the bottom drawers for?
The bottom drawers are primarily used for storage. Although they may have enough radiant heat to keep some food warm, they were not designed for that purpose.
Do I need to do an initial burn off of the ovens?
No, the initial burn off is done by our Quality Control Team and does not need to be done again.
Resources To Get Started
Is there a New Owner’s Guide?
Yes, there is a 24-page New Owner’s Guide located in the front of the tan 3-ring factory binder. We recommend starting with the New Owner’s Guide, especially if you will be cooking and caring for the range. If you cannot find your New Owner’s Guide, feel free to request another one or see the digital version at this link.
What other “get acquainted” resources are available besides the New Owner’s Guide?
Customer Care @ care@frenchranges.com, or 425-481-8850
Instagram @lacanche.usa (cooking, accessory use, and owner reels)
YouTube @ https://www.youtube.com/@LacancheTV (cooking, accessories, cleaning)
Facebook Lacanche Owner Forums (Lacanche Range Lovers, Lacanche Confidential)
What is the biggest learning curve in cooking on my new Lacanche?
It can be intimidating to receive an appliance from another country, but for the most part, a Lacanche cooks similarly to any other range, especially if you have been using a gas cooktop.
There are three primary elements that may be unfamiliar:
- Heat Retention: Due to how solidly they are built, there is very little heat escape. Thus, you may need to turn down the temperature on your oven and check your dish sooner than the recipe calls for. This is especially true of baked goods.
- High Output Burners: The Lacanche was created with high output burners, so it is essential to use your 5K burner, a Portable Simmer Plate, a diffuser, or the French Traditional Plate to achieve a low temperature/long-term simmer. For more information, please see our accessories link on our website and “Simmering Tips” in the New Owner’s Guide.
- Ignition Process: The cooktop was built with a safety technology in which the thermocouple has to heat up before the gas valve fully opens. Due to this fact, ignition is not automatic. Please follow the instructions on the “ignition” question below.
Using the Cooktop
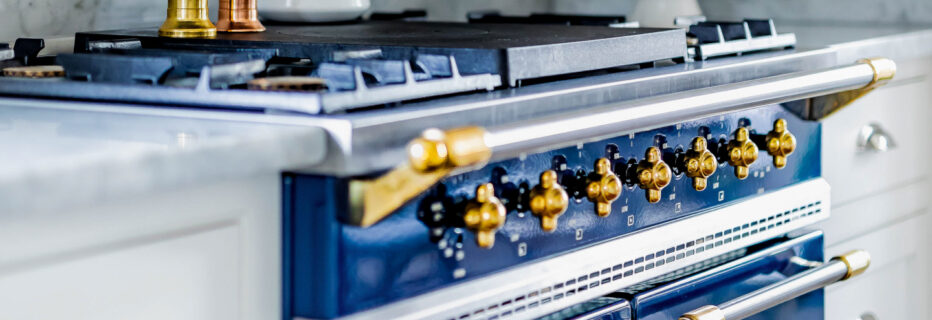
Is there a certain way I should ignite my burners; some of them seem hard to ignite or they keep clicking?
To ignite, depress the control knob and rotate counterclockwise to “HIGH” while keeping it depressed for 5-10 seconds, which holds the valve open to ignite. Once the burner ignites, continue depressing the knob for 5 or more seconds to allow the thermocouple to fully heat. Then release the knob and turn it to the desired temperature. If you release too soon, the burner may go out. If this happens, just depress the knob where it is and hold for a few more seconds. This process will become automatic after a few tries. If you are doing all this correctly and it is still not lighting or continually clicking, please call the Support Team at 1-888-222-2930.
How do I know what burner strengths are best for what food(s)?
All the ranges are configured differently, so you may not have all the burners listed below. The 18K burner (the largest burner) is great for boiling water, searing a large piece of meat, using a large pot, or sautéing something quickly. Your 11K and 15K burners will become your everyday burners for sautéing, searing, and general cooking. The 11K and 15K are best used if you will be interacting with your recipe and it will cook in 30 minutes or less. Your smallest 5K burner, set on low, is great for foods needing a moderate to aggressive simmer. If your recipe will be sitting on the 11K or 15K burner for more than 30 minutes without tending, we recommend using your Portable Simmer Plate or another method to diffuse heat.
Since these are high output burners, what is the best way to simmer foods?
For simmering, it will be essential to use either your 5K burner, Portable Simmer Plate, a diffuser, or the Traditional Plate to achieve a low simmer or to keep things warm at a consistent low temperature. To lower and diffuse the burner heat, here are some tips:
Portable Simmer Plate (comes with Classique range models)
The Portable Simmer Plate comes with all Classique range models. It can fit over your 5K and 11K or your two 15K burners, depending on the intensity of heat you want. This Portable Simmer Plate functions the same as the Traditional Plate except it is portable. The Portable Simmer Plate rests securely on a side grate of any pair of burners. If you are trying to achieve a low temperature, place it over the lowest BTU burner and put one or both burners on low. This plate will heat up and retain heat like cast iron. For keeping things warm, move your pot slightly away from the heat source. To increase the heat, move the pot toward the center of the heat source. At first, you may find yourself changing the position of the pot or pan to achieve your desired goal, but you will quickly learn the best positions and burners to use for each dish. This is a very popular method in French cooking.
Traditional French Plate (comes with Traditional range models)
When using your Traditional Plate, make sure to keep the burner on low and then move your pots and pans to the outside edges of the plate until you get the desired results. If the Traditional Plate is left on for a while, it may build up enough heat that you can turn it off, and it will stay warm for quite a while. You will become very adept at finding the perfect heat for your favorite dishes. The Traditional French Plate placed right over the burner will be hot enough to sauté foods.
Diffuser
There are many different types of one-burner diffusers on the market. These are just placed directly over the burner and help to diffuse heat. If you have a Traditional Plate on your range, there is a round center plug on the plate that can be removed with the plug removal tool and used over one of the burners as a diffuser. The diffusers that work the best are thick cast iron.
Wok Ring with Traditional Plate Cover
Place the wok ring on any burner locked into the grates. Put the round center plug from the Traditional Plate on top of the wok ring. This lifts the pan higher from the flame.
Using the Ovens
How do I ignite my gas oven?
If it is the very first time the gas oven is lit, a purging process must be performed by depressing the control knob, rotating counterclockwise to “HIGH,” and holding the valve open until gas reaches the main oven burner and ignites. This may take up to two minutes.
Once fully purged and under normal use, you will only need to hold the knob in for up to 20 seconds prior to ignition. With active use, this will take approximately 10-15 seconds for the gas oven burner. If you release the knob too soon before allowing the safety thermocouple to fully heat, the burner will simply go out. If this happens, repeat the process of ignition and hold the knob in longer than previously attempted. The gas oven takes 20 minutes to preheat to 350 degrees.
What do the two lights mean on my electric oven?
The amber LED light signifies that the electric oven elements are actively heating the oven cavity, while the red light simply indicates that the oven is on. You will see the amber light go on and off as the heat cycles throughout the cooking session. To reach 350 degrees, we recommend a solid preheat time of 25 minutes, and longer for higher temperatures. This ensures the entire oven cavity has reached a stable temperature. The first time the amber light goes off, the oven is technically up to temperature, but we’ve found that 25 minutes produces a solid preheat.
Is there a recommended preheat time?
Your preheating times will differ based on whether you are using your gas, electric convection, or standard electric oven. For the standard electric oven, we recommend a 25-minute preheat to reach 350 degrees. The electric convection oven will take 15-20 minutes to preheat and will cook dishes approximately 25% faster than a standard electric oven. Gas ovens will reach a stable 350 degrees in 15-20 minutes.
Why is a preheat needed?
The more stable the preheat, the better the results. Baked goods especially need the oven at the correct temperature from the start for proper rising and gluten behavior. A cold baking dish can spike the heat, causing burning on the top or sides, but this effect is diminished with a proper preheat. Additionally, foods will be moister as a proper preheat means the dish won’t linger in the oven while the right temperature is being reached.
I have an oven with a toggle switch; what is it for?
All vertical convection ovens and some standard or large electric ovens come with the option for convection. If the toggle switch is in the up position, this is static electric mode. If the toggle switch is in the down position, this is convection. The convection mode engages a fan in the back of the oven, cooking your food 15% to 20% faster. Often, people use convection for roasting meats, potatoes, vegetables, and reheating foods. For baked goods, because the fan is in the back, we recommend turning them halfway through.
What pans will fit in my standard size oven?
The standard size oven is found in the Bussy, Beaune, Cluny, and Chagny models.
Our standard size oven is 16 1/4″ W x 11 1/2″ H x 17″ D. There are many jelly roll pans, cookie sheets, and roaster pans on the market that will work with this size. When purchasing, make sure you are getting the dimensions with the handles included.
Each range comes with a drip tray and pastry sheet(s) that are tailor-made for your oven’s space. The standard size drip tray is 15 ¼” W x 14″ D. This versatile drip pan with a 1″ lip can be used for baking, roasting, or broiling. The pastry sheets fit on the entire surface of the rack and can be used for all kinds of baking, cooking, and reheating needs.
Here are a few pans we have found to work well. We don’t endorse any one product, and there are plenty of options out there.
15″ x 10″ Caraway Baking Sheet
www.carawayhome.com/products/medium-baking-sheet?color=cream
12″ x 9″ x 1″ 1/4 Sheet
17 1/4″ x 12 1/4″ x 1″ h 1/2 Sheet Baking Sheet*
www.williams-sonoma.com/products/ws-goldtouchpro-ns-half-sheet/?pkey=csheet-pans-cookie-sheets.
*Please Note: This only fits in an electric oven, and you must use the drip tray in place of an oven rack. The baking sheet can fit right on top of the rack (see photo). This set up could change the cook time of some recipes since the drip pan has a solid bottom.
15 1/4″ x 10 .5″ x 2.5″ Williams and Sonoma Roasting Pan
www.williams-sonoma.com/products/le-creuset-ss-roasting-pan/?pkey=s~Roasting Pan~40&sbkey=default
We have a 39″ Chagny in our Seattle Showroom kitchen and have cooked many meals for 17+ staff members. We find the standard oven cavity size is ample enough to achieve our needs. If you have additional questions, please let us know.
Will I be able to fit a 20 pound turkey in the standard size oven?
You should be able to fit a 15-20 pound turkey in your standard size oven. Make sure to use a roasting pan with upright handles so that the handles don’t take space in the oven, and cook the turkey on the lowest rack.
I have a large size oven; what size pans work best in this?
The Comatin, Rully, Volnay, Vougeot, Chassagne, Chamberlin, Saulieu, Savigny, Fontenay, Citeaux, and all Sully models have large-sized ovens. Our large ovens are 21 1/4″ W x 11 1/2″ H x 17″ D (16″ D if you opted for an electric/convection model). Our large drip pan, which is 21″ x 12 1/2″, is very versatile and can be used for baking, roasting, or broiling. In general, a 1/2 sheet pan will fit in a large oven.
Many brands have half sheet pans (13″ x 18″), such as King Arthur Baking Company, Williams Sonoma, and Crate and Barrel.
We have found many roasting pans that fit the large ovens, including but not limited to All-Clad Stainless Steel Large Roasting Pan with Rack, Falk Roasting Pans, Viking from Macy’s, and more.
Will I be able to fit a 25 pound turkey in the large size oven?
Yes, you will be able to fit a 25 pound turkey.
What foods are best to use with my Petite Broiler Oven on the Chagny models?
The petite broiler oven is considered a finishing oven used for the final touches and/or browning of a particular dish. It works great for broiling low-profile dishes, vegetables, potatoes, and toasting bread. If you are using it as a regular oven and not as a broiler, please keep in mind that the preheat time is the same as the regular-sized oven.
Cooktop Options
How do I use my French Traditional Plate?
The French Plate is a large, flat surface made of cast iron. A removable round “plug” sits in the center of the French Plate, covering an 18,000 BTU burner directly below. The heat from this powerful burner will be diffused across the entire plate, with the heat being most intense in the center and radiating outward to the edges of the plate. The plate is not intended to be a direct cooking surface; please always use cookware.
Use:
- Heat is distributed from the center – the center ring is hottest while the edges are cooler.
- It is designed to accommodate several pots cooking at different temperatures at the same time. The center is ideal for pasta or the first stages of making your own soup. Simmer soups and stews a few inches from direct heat and melt butter or chocolate at the edges.
- Preheating the plate takes 15 to 20 minutes.
- The wok ring fits easily over the open flame once the round Traditional plug is removed using the Traditional Plate Plug Removal Tool.
- The round Traditional plug can be used as a diffuser on one of the other burners.
- The cooktop can be challenging to clean. We do offer traditional plate covers to put in place when the cooktop is not in use.
How do I use my Plancha?
The Plancha is a high-heat, non-removable griddle option made of chrome-plated steel, comparable to Japanese teppanyaki grills. The design and high-heat features of the Plancha are ideal for searing meat, seafood, or vegetables and provide a very healthy way to prepare food. We advise lightly oiling to avoid any sticking. It’s great for eggs and pancakes, searing meats and veggies, but not ideal for high-fat/greasy foods because the trough surrounding the cooking surface isn’t very deep. Because it’s chrome and non-reactive, you can deglaze, which is great for caramelization.
Use:
- To begin, remove the plastic protection that is on the underside of the cover. Initial use will cause smoke, which is normal; no need for alarm.
- Use small amounts of high-temperature oil (high smoke point oil) a few seconds before cooking and between each use. This will help avoid sticking.
- Preheat for 15-20 minutes for low to medium heat. For high heat searing, it may take 30-40 minutes depending on the desired temperature.
- A Splatter Guard for the Plancha is available from our Support Team.
- Do not put the cover down until fully cool or it may cause warping. The Plancha can remain hot for up to an hour.
- Do not use metal utensils or abrasive cleaning products.
- Note: The Electric Oven Safety Reset can be partially tripped during transit. To reset, see the Electric Oven Reset video online.
How do I use my Flame Grill?
The Flame Grill essentially brings your outdoor grill indoors. It generates controlled heat without food juices dripping onto the heating elements, resulting in a healthier style of cooking. Juices drip down onto the “V-groove” diffuser underneath, then flow down to a small tray in the front to collect all the fat. This cooktop option, which uses radiant heat to quickly cook meats, fish, or seafood, helps to preserve moisture and flavor. It operates just like a surface burner for igniting and temperature control. The Flame Grill must be used under a high-capacity exhaust hood system.
Use:
- Use no oils or fats when cooking over briquettes as these may burn and smoke.
- It is best to preheat. Once preheated, briquettes will maintain their heat for a long time, making them efficient for grilling.
- The incline of the grill rack allows grease to run off the recovery rack and collect in the grease tray.
- The multiple levels of the grill rack allow adjustment of heat intensity by changing the distance from the heat source for faster or slower cooking.
- Thick pieces (e.g., ribs of beef) should not be seared too quickly to avoid a well-browned outside and a raw inside. Untrimmed fat may burn; simply move food away from the flame.
- Use tongs to turn food and clean the grill with a brush between each cooking session to avoid food sticking to the grill.
- Use oven gloves when handling the grill brass handles to prevent burns.
- Cuts can be grilled lengthwise and crosswise once or twice; twice will more evenly distribute the juices and produce a better result.
How do I use my Multi-Cooker?
The Lacanche multi-cooker is a versatile cooking tool that allows the preparation of various types of food through three different cooking functions. It may be necessary to adjust the house water hardness for the auto-fill feature to function properly.
Cooking Functions:
- Steamer: This function allows the cooking of vegetables, fish, meat, or any preparations needing soft, regular, and homogeneous cooking with a high level of moisture. The steamer function can also cook in a multi-level tower to handle a high capacity of dishes or various dishes simultaneously.
- Double-Bath: This function maintains the temperature of prepared food, provides soft cooking at a controlled temperature, and is useful for making preserves.
- Boiling: This function allows cooking through immersion, reheating vacuum-packed food, reheating pasta and rice, and convection cooking in temperature-controlled water. The thermostatically controlled temperature offers a complete array of possible uses.
Use:
- The Multi Cooker has its own user guide under the Support Menu tab (include link) “Range Install.” This information is also located in the tan 3-ring binder sent with your range.
How do I use my induction burners?
Induction is the latest development to be adopted as a heating method for cooktops. This technology uses the principle of the electromagnetic field, which is why it requires cooking utensils that have bases containing ferromagnetic material. The induction coils may make slight vibration noises during operation. This is normal. Induction cooktops heat faster than electric ones. Only the cookware heats, not the burner, offering precise temperature control for more controlled cooking.
- The surface of the cooktop remains cool to the touch, ensuring safety and easier cleaning.
Use:
- Induction is only compatible with cookware composed of magnetic materials such as stainless steel and cast iron. Please use cast iron approved for induction, as some cast iron can be coarse and scratch the glass. Not all stainless cookware works equally well on induction (see manufacturer’s info). Many familiar brands provide cookware that is compatible with induction.
- There are 1-9 power settings, and a Boost mode which you can activate by turning the knob all the way past 9 and holding it for a few seconds. The letter “P” will show on the digital display. See the factory manual for more info.
- Generating a humming sound while cooking or boiling is normal. Slight sounds, like hums or buzzing, may be produced by different types of cookware.
- You must use the right-sized cookware and place it in the center of the heating element to activate. Make sure the pan has a flat bottom.
- Familiarize yourself with the different settings; some of them are power boosts and will turn off at a specified time.
- The induction cooktop can scratch easier due to the smooth glass. Avoid sliding rough cookware on the bottom and using abrasive cleaning materials.
- While in use, if the pan is removed from the burner, power is cut automatically. If the pan is repositioned on the burner, the power automatically restarts.
How do I clean the cooktop options above?
Please see the “cleaning” section on the CARE menu, and/or the New Owners Guide.
Optional Accessories
How do I use my portable griddle plate?
How do I use my portable grill plate?
The portable grill plate is an optional accessory. The cast iron grill plate rests over any two side burners, locking onto the grate to prevent sliding. By setting the back burner to “high” and the front burner to “low,” a corresponding heat gradient may be achieved. Imagine up to eight tenderloins grilled at the same time, each finished to perfection! The grill plate dimensions are 20 inches by 10¼ inches.
What other optional accessories are there for purchase?
Please refer to our accessories tab on our website. There are many other accessories such as a grill plate splatter guard, plancha splatter guard, stainless steel side burner, and Trad Plate covers to use for workspaces, telescoping racks for easy glide, large butcher block, large reducing trivet, and many others. You can either order these from our sales team when you order your range, or after your range is delivered from our Support Department at 1-888-222-2930 or support@frenchranges.com.
Can I purchase extra trim to be used on my other appliances or cabinets?
Yes! Email our Support Department at Support@frenchranges.com to request our latest trim catalog.
If I think something is wrong with my range, who do I call?
If it has to do with using your range, cooking, or cleaning, please call our Customer Care Team at 425-481-8850 or care@frenchranges.com
If it has to do with a technical issues, service or part needed, please contact our Support Department at 1-888-222-2930 or support@frenchranges.com. If your range is still under the 3-year warranty, the Support Team will coordinate with one of our Authorized Service Providers. Range owners who are out of the warranty period are still encouraged to contact our Support Department, but may also simply look up their local service provider on our Servicer Locator Map found here: https://www.frenchranges.com/technical-Support/service-warranty If there is not an authorized Service Provider in your area, please contact our Support Team for further information.